


 LAPTOP
  PRINTER


 SECURITY CAMERA
 SANAKO STUDY 1200
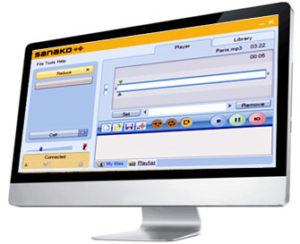
DIGITAL LANGUAGE LAB SANAKO STUDY 1200 TUTOR APPLICATION
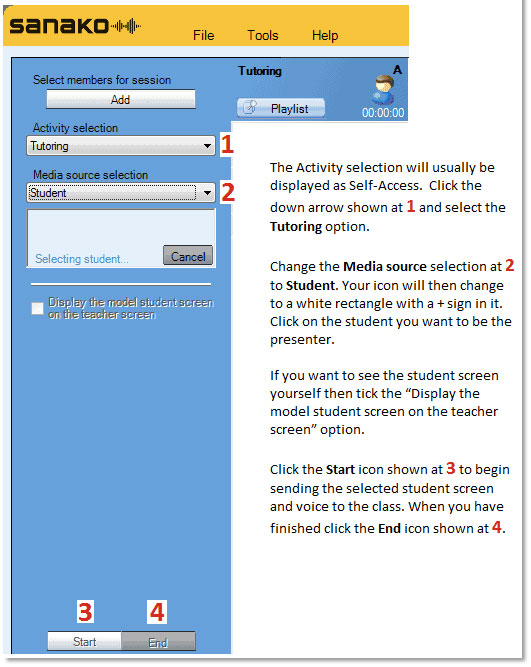
Teachers use the Study Tutor application, which is the main interface to the Study system. The Tutor application allows teachers to instruct with the Study system and to control the classroom computers.
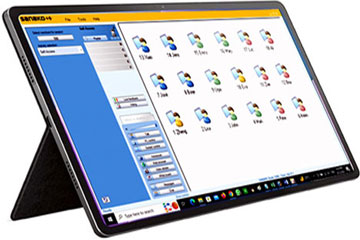
DIGITAL LANGUAGE LAB SANAKO STUDY 1200 STUDENT APPLICATION
The Study Student application is installed onto all student computers. Study Student connects to Study Server at system startup and runs in the background listening for commands from Study Tutor. Students can open the student interface to work independently, however, teachers are able to control student computers, regardless of whether the Student application is visible on student screens or not.
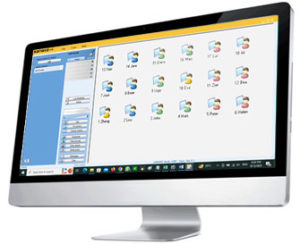
DIGITAL LANGUAGE LAB SANAKO STUDY 1200 SERVER
The Study Server application is the information center of the Sanako Study system and both the Tutor and Student components automatically connect to it. All system data is passed through the Study Server and it allows communication between the Tutor and Student components. We recommend using classroom-specific server computers, commonly the teacher computer in each class, with individual classroom names.
 Hotline Support
+880 1995 584 322
+880 1717 157 398
+880 1911 385 563
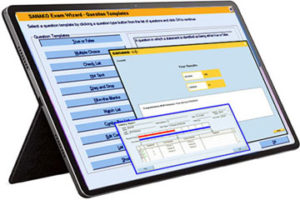
SANAKO EXAMINATION MODULE
Learn More…….
Price : ৳ 6,500
PART-01 DIGITAL LANGUAGE LAB SANAKO STUDY 1200 LANGUAGE LAB MODULE
Using Digital Language LabSanako Study 1200, part 1
Put students into groups Digital Language Lab Sanako Study 1200 Module
Right click on a student icon and select the Move to session option followed by the group of your choice.
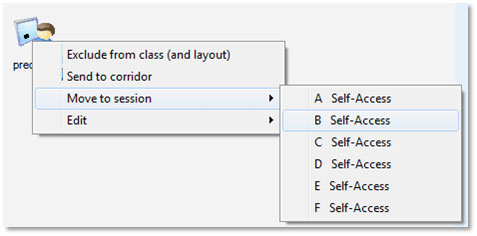
The student icon will change colour as shown below to indicate what group that student now belongs to.
Share files with students Digital Language Lab Sanako Study 1200
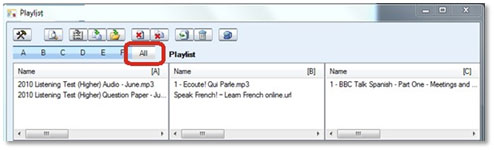
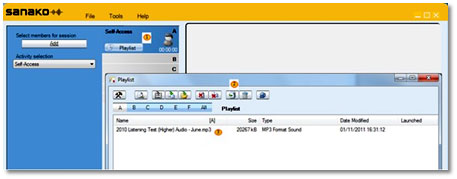
Create a playlist
A playlist will allow you to share files with all students within a group. You can use this function to share files with all students or with just a group of students.
Click on the Playlist icon:
You can then add, copy and paste, drag and drop the files you want to each of the six possible group playlists or to All to share it with the whole class.
Share audio files from the internet or a CD
Open ripping tool from the Tools menu:
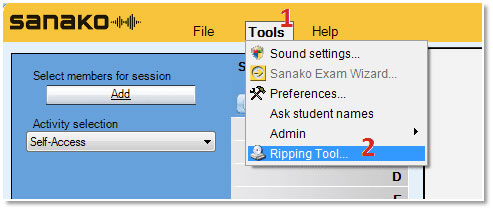
You can choose the source to be CD or the internet according to your need.
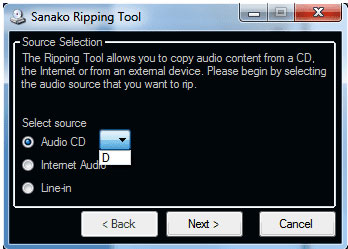
After that, you can follow the instructions to either rip the CD or start recording from the internet.
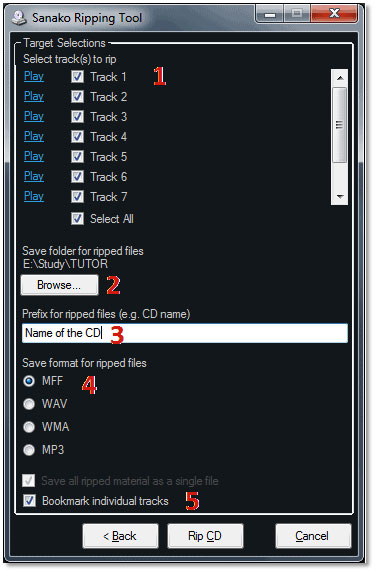
Tips: For an Exam CD – select the save format as MFF and check the Bookmark individual tracks option. This will create a single file that students can listen to and they can access any part of the examination instantly by simply clicking on a numbered bookmark.
Make sure that you use a full and complete prefix for the ripped files – the more descriptive the better! Remember that you are likely to be looking for this content many months or years later.
Save the ripped file(s) to the correct area on your network if you want your students to access this material. If you save the file(s) to your My Documents area, the students will not be able to access this material.
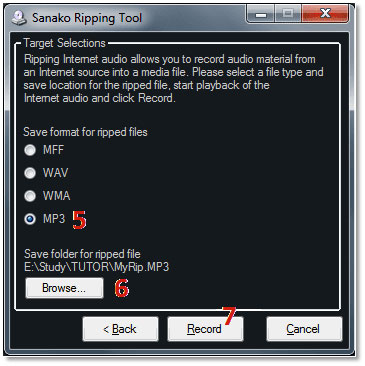
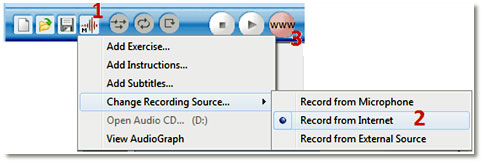
Your students can also record audio from the internet by clicking the Mode icon – Record from Internet and then click the www icon as shown below is steps 1, 2 and 3.
Get feedback from your students Digital Language Lab Sanako Study 1200
Ask for lesson feedback – the traffic light approach
Why do this? Ask your students if they are ready to carry on for example – green for YES, red for NO and amber for NOT SURE. You may have given the students three things to do and you could ask them to change their feedback as the lesson progresses – green as they work on the first thing, amber for the second, red for the third and Call when complete.
If the teacher clicks the Live feedback icon a three-bar graph appears along with a % for each of the three colours – Red, Amber and Green.
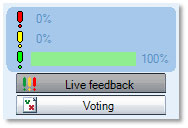
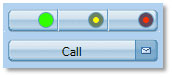
Students will then see three new icons appear above the Call icon of their player. The system assumes that the green icon has been clicked until the user selects either the amber or red option
Once a student clicks one of the three colours their choice will be shown to the teacher on the corresponding student icon and the % values will change on the tutor graph.
Get students to give their full names Digital Language Lab Sanako Study 1200
Why do this? It is a very good way to learn the names of your new classes! However, the main reason is that when you collect work from students this “given name” is added to the collected file e.g. Paul Redhead.mp3 – hence you know exactly who the file belongs to without having to rename any files.
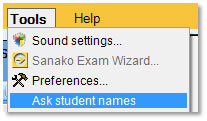
It is normal for each student icon on the teacher interface to appear with the login name for that student. However, the teacher can ask students to enter their full names by selecting the Tools – Ask student names option.
Each student will then see the Personal data window appear in the top left of their screen and they can enter their full name and click OK.
![]()
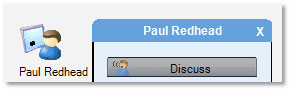
The teacher will then see this given name under that student icon.
Respond to Call Teacher requests Digital Language Lab Sanako Study 1200
Students can click the Call icon to get help.
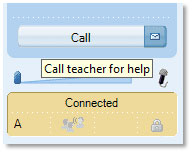
The teacher then sees a “?” above that student’s icon. Clicking on the ? icon, the teacher can go into the Discuss mode for a 2-way conversation with that student.
Use chat discussion to get plenary feedback Digital Language Lab Sanako Study 1200
When the teacher clicks the Chat icon the blank Chat window appears.
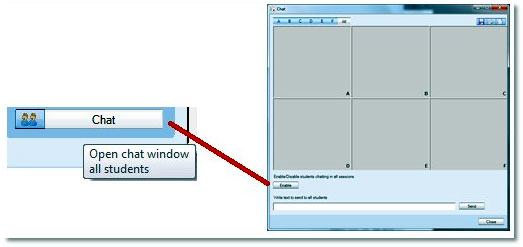
Once the teacher clicks the Enable icon the chat session becomes active and the window changes to show coloured backgrounds.
If you are conducting a whole class session then click on the A icon at the top left of the Chat window and the whole top section will turn blue.
![]()
Simply type your question into the text box at the bottom of the window and then click the Send icon.
Your text will be shown to all the students and they can enter their individual response. As each student responds your chat window will update to display their answer.
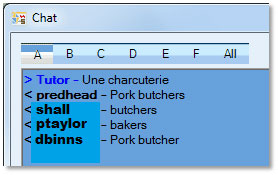
In this example you can see that predhead answered first and also answered correctly! Bring that element of competition into your lessons!
Classroom Control Activities Digital Language Lab Sanako Study 1200
Create an attendance report
Click on File and then select the Create Attendance Report option.
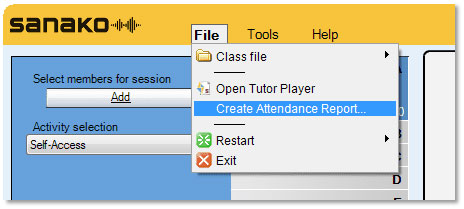
You will then be shown the Save As window as shown below, select where you want to save your text file to and give it a suitable name.

When you open the saved report it will look something like shown below with the date and time automatically added along with a list of all the students logged in to your lesson.
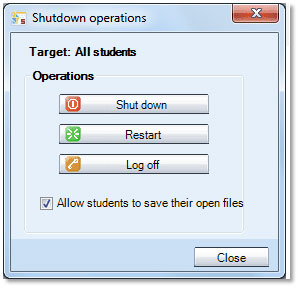
Log off students – Digital Language Lab Sanako Study 1200
Click PC control and then Shut down operations

Click Log off. You can also Shut down or Restart!
Blank student screens to gain attention Digital Language Lab Sanako Study 1200
1. Click PC control
2. Click Lock PC
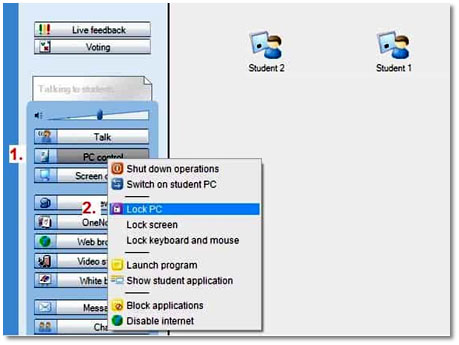
The student icons turn into lock images
The students all have a BLACK screen now! Imagine that this is just like you placing a black piece of paper over the screen and hence everything they were working on is behind the paper and hence safe!
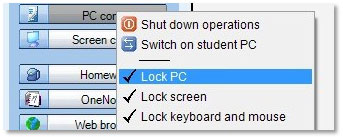
When you are ready you can “remove the black paper” or unlock the screens by repeating the 2 steps above that you did before – as shown below – click PC control and then Lock PC.
Prevent/allow applications on students’ computers
Why do this? You can either prevent or allow students to use certain applications. For example, if your lesson only requires students to have access to say Word and PowerPoint then you can select just those two applications and no others will work. This ensures student focus and you can be 100% confident that your students can’t launch anything else!
There are two clear options for you as a teacher to consider:
OPTION 1 – do you want to only allow your students to launch certain applications?
OPTION 2 – are there any applications that you want to prevent students from launching?
1. Choose PC lick the PC control icon shown to the left and then select the Block applications option from the drop-down menu.
1. Choose PC control
2. Choose Block applications
To prevent students from launching certain applications.
Tick the applications from the list in the top area.
Click Prevent
To allow students to only launch certain applications.
Tick the applications from the list in the bottom area.
Click Allow
Tips: If you feel that there may be some applications not listed then click the icon near the top right of the Block application screen shown here with an orange square round it. This will update the list so that any newly launched applications are added to the list.
If you want to block applications for just one selected student then you can click the Target drop-down menu shown below and select an individual or group of students.
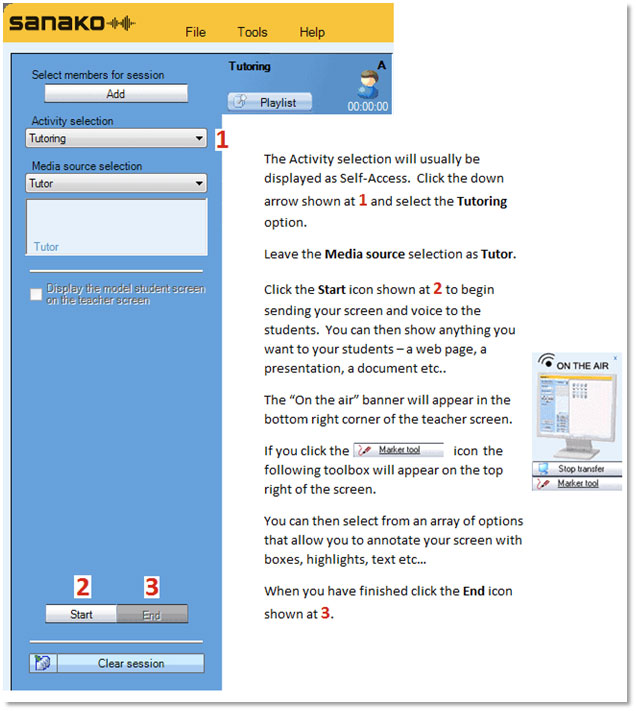
Classroom demonstration activities Digital Language Lab Sanako Study 1200
Share the teacher’s screen and audio
Share a student’s screen and audio
Classroom monitoring activities Digital Language Lab Sanako Study 1200
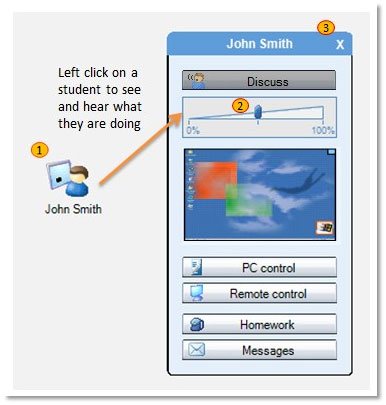
Monitor a student’s screen and audio
1. Left click on the student that you wish to monitor.
2. You see a small thumbnail image of their screen
3. Click on Remote Control or blue rectangle to see that students screen in detail
4. Click the X to stop monitoring that student
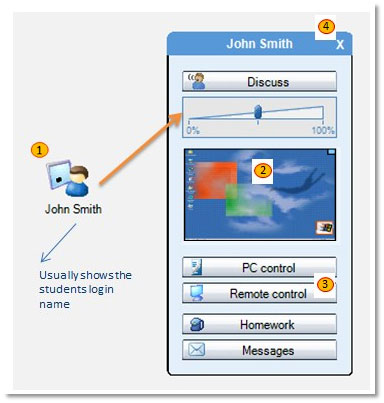
When monitoring the student will have no idea that you are doing so and you will also hear everything they are saying and listening to. The student’s mouse location is shown as a green arrow for you to follow.
Whilst monitoring a student screen you can take full or shared control of their mouse and keyboard if required by clicking either the Remote control or Collaborate icons.
Tips: If the student is working on a text document or presentation and you wish to work with them to correct mistakes/suggest improvements, select the Collaborate option. This means that you can take it in turns to enter text and discuss.
If the student is working on a web page or interactive type application, select the Remote control option. This means that you both don’t up trying to move the mouse at the same time!
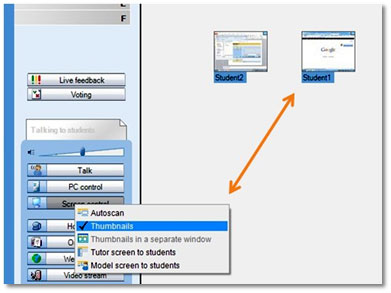
Monitor the whole classroom at the same time
1. Click Screen control
2. Click Thumbnails
The student icons turn into live images.
PART-02 DIGITAL LANGUAGE LAB SANAKO STUDY 1200 LANGUAGE LAB MODULE
Using Sanako Digital Language Lab Study 1200 module, part 2
Digital language lab Sanako Study 1200 Listening activities
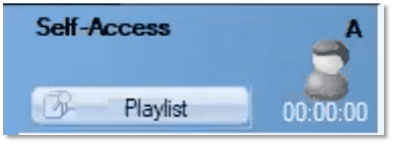
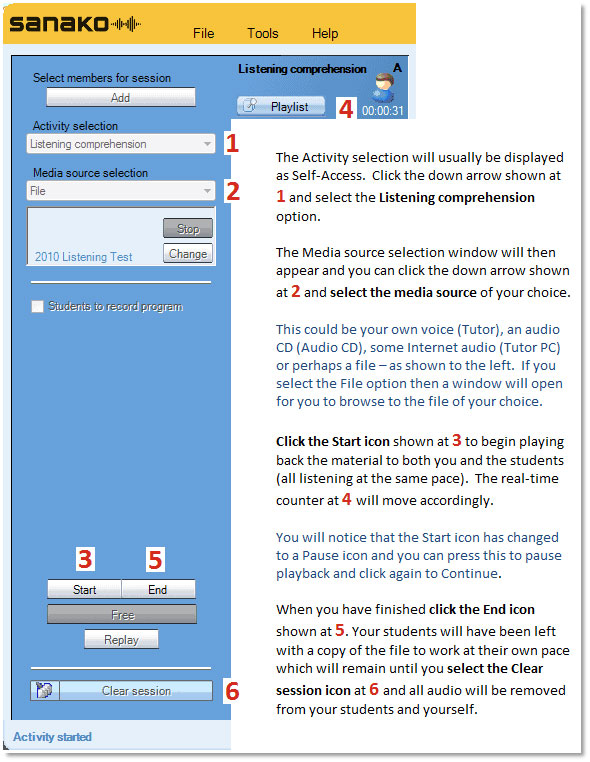
Give students a file to work on at their own pace
1. Click Playlist
2. Click Add and browse for the file you want your students to work on
3. The file will then be listed in the top section of the playlist and will also appear in the playlist area of the student player as shown below.
Tips: You can add as many files as you want to the list and of any type e.g. Audio, Video, Pictures, Documents, Presentations, Web links etc…
You can Copy and Paste to the Playlist area
You can Drag and Drop to the Playlist area
Make sure you delete files in the playlist at the end of the lesson to make sure you start the next lesson with a blank playlist
Make use of individual Tutor playlists
Digital language lab Sanako Study 1200 Play audio to your students at a pace that you decide
Digital language lab Sanako Study 1200 Speaking activities
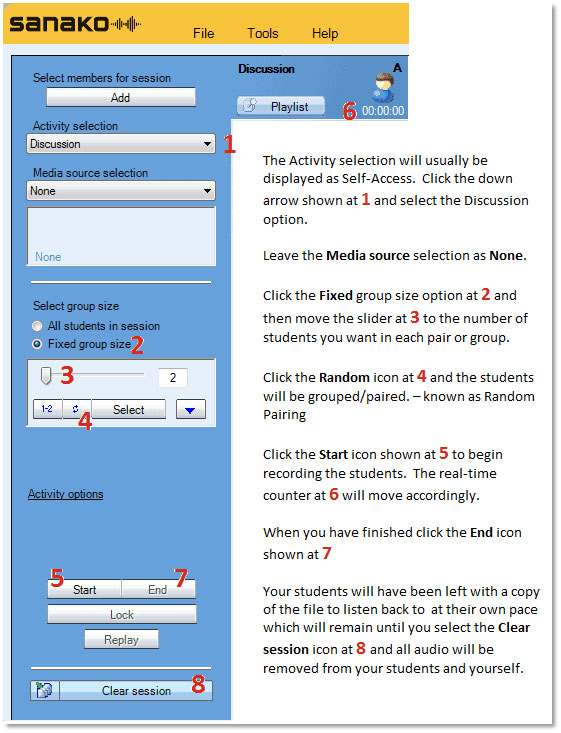
How to create a whole class discussion environment
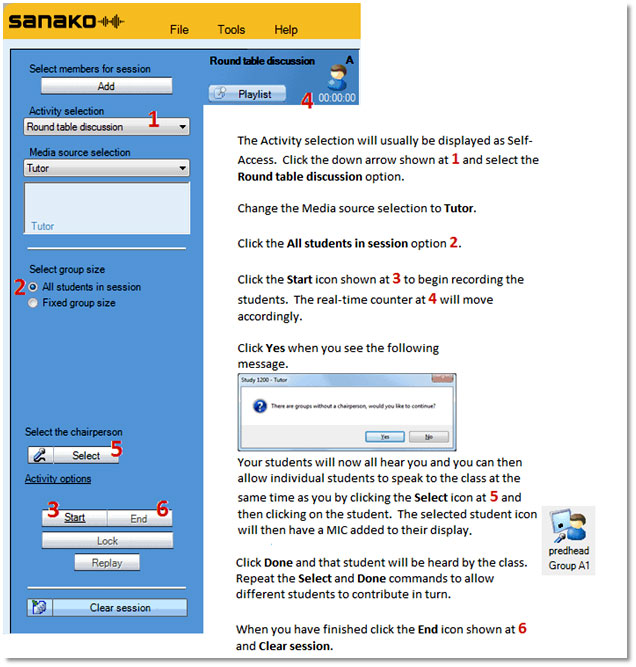
If you want to record the class discussion then select the Record discussions option in the Activity options menu.
You may also want to allow the students and yourself to interact using a textual chat window whilst talking.
If you enable textual chat then the students will see the following window appear on their player.
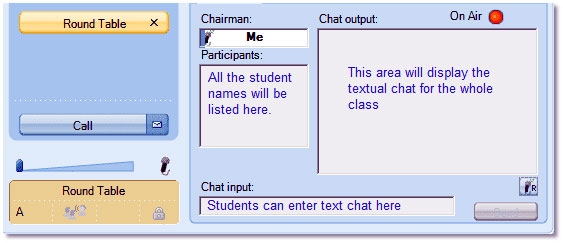
Students can “request” the microphone by clicking the microphone icon on their end. If they are given the microphone by the teacher, the On Air icon will illuminate and the Chairman: field will display Me as shown above.
How to pair or group students to talk to each other
If you want to listen to any of the pairs or groups once the activity is started then simply click on any of the students in that pair or group.
If you click the Discuss icon whilst listening then all the pair/group members will hear you.
The members of the group are shown whilst monitoring.
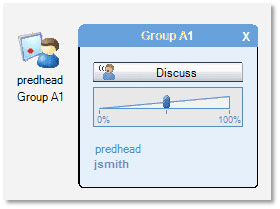
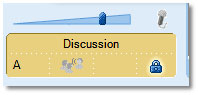
Students can find out who they have been paired or grouped with by simply clicking the word Discussion in the bottom left part of their player.
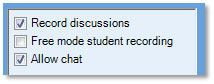
Activity Options:
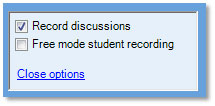
+ Record discussions: to collect all the student pair/group discussions.
+ Free mode student recording: to only collect audio when the students have pressed their SPEAK icon.
Tip: The Free mode student recording option is very useful if you only want to collect the audio when the students actually start the exercise – it may be that the first minute or two is spent setting up the exercise and deciding on who is who in the role play?
How to perform a “drill type” activity Digital language lab Sanako Study 1200
Why do this? Ideal preparation for listen and repeat exercises; listen and translate routines or perhaps question and answer sessions. Save time by doing this to the whole class at once.
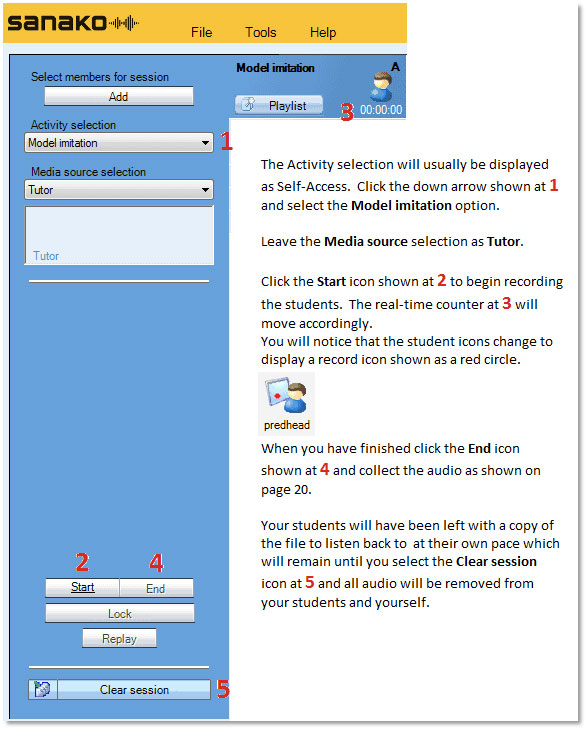
Once you press the End icon the following screen appears.
![]()
Click the Collect icon and every student recording will be collected as an individual file to the location specified as an MP3 file.
The files will be named according to name given under each student icon on the teacher screen e.g. predhead.mp3, jsmith.mp3.
Tips: The recordings will only contain the student responses and will not include the teacher voice. However, if you want to collect your voice as well then you can select the Advanced icon in the window shown above and tick the option to collect the Program track.
You may also want to use a different audio source from that of your voice. To do this simply, click the Media source selection drop-down menu and you could for example select an existing MP3 file or use an audio CD.

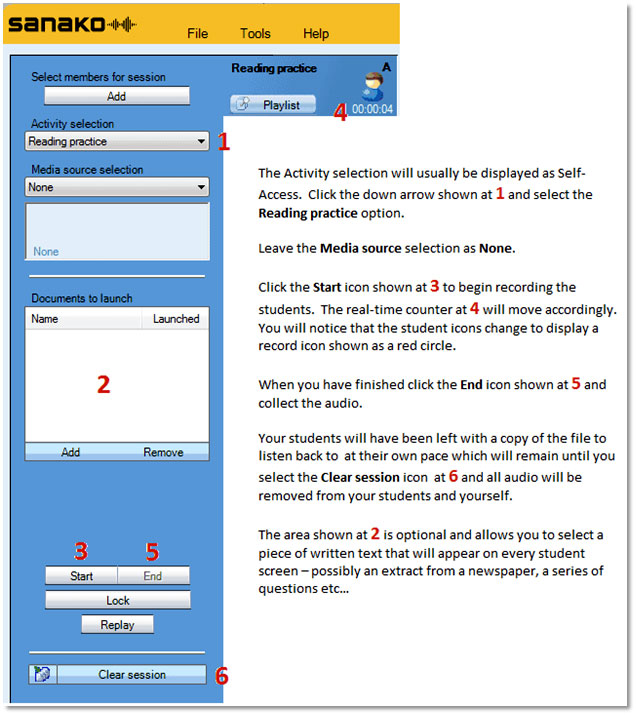
How to record and collect student recordings automatically – Digital language lab Sanako Study 1200
Why do this? Ideal preparation for speaking tests – simply provides students with a topic area and then allows them to speak for a given time and collect their recordings back. Once collected you can double click on any file and play it back through the class speakers for peer-assessment.
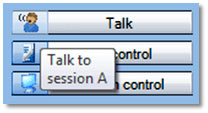
How to speak to the whole class – Digital language lab Sanako Study 1200
Simply click on the grey Talk icon on the tutor screen.
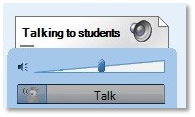
The “Talking to students” and loudspeaker icon on the Tutor interface becomes active. The black moving bar indicates when you are speaking – sometimes known as All Call.
How to speak with an individual student – Digital language lab Sanako Study 1200
1. Click the left button on your mouse whilst the pointer is over a student.
2. Click the Discuss icon – it will change to a darker colour when active
3. When you have finished listening then click the “X” at the top of the window.
How you can collect in student work at the end of the lesson – Digital language lab Sanako Study 1200
Why do this? Ideal for marking purposes – collect in student work to take away on say a USB pen stick. Gather evidence of student attainment for on-going personal development plans and future lesson planning. Ensure that you have a copy of your students work for the time when they say “I have lost it!”
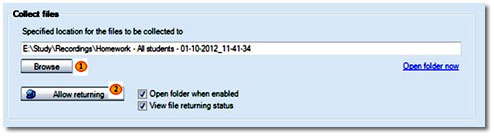
Click the Homework icon and the collect files screen will appear.
![]()
Ensure that your students have all saved a copy of their work before you collect it in.
1 – Decide where you want to save the student work – it can be anywhere such as a USB pen-stick or your My Documents area. By default, the student work will be collected to a pre-defined shared area on your network (usually a directory of your shared network languages folder) and a directory will be created based on the date and time.
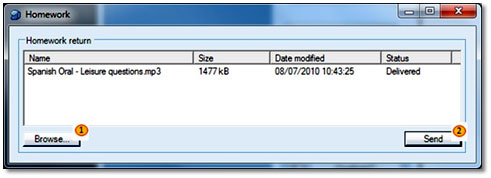
2 – Click the Allow returning icon and your students will be shown a homework return screen.
All they need to do is to browse for their saved work and then send – shown as 1 and 2 below.
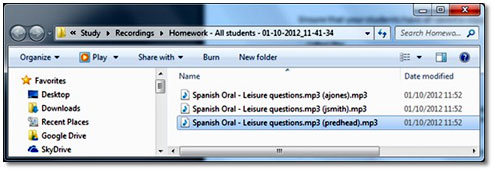
As your students send their work you will see them appear in the tutor collection folder below. Each file sent clearly shows who sent it in the brackets part of the filename.
PART-03 DIGITAL LANGUAGE LAB SANAKO STUDY 1200 LANGUAGE LAB MODULE
Digital Language Lab Using Sanako Study 1200, part 3
Digital Language Lab Web Browsing Activities
How to launch the same Web page to all students
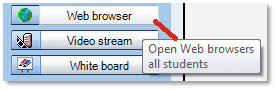
Click the Web browser icon and the teacher browser window will appear as shown below – Internet Explorer will launch at all the student positions.
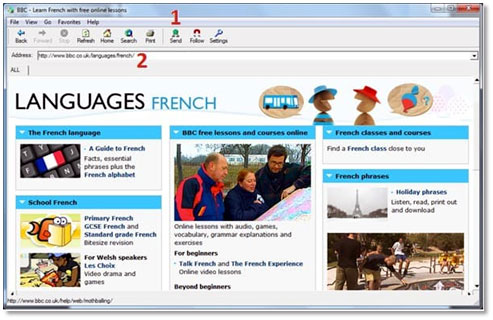
1. Click the Send icon
2. Browse to the Web page you want to send
You can also keep students looking at the same Web page as you by choosing the Follow icon shown below.
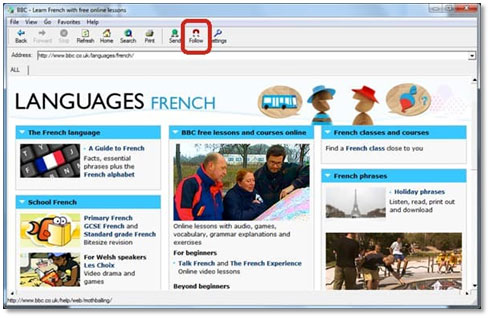
Once the Follow icon has been clicked then the students will go to exactly the same page as you do! When you click on a new page or hyperlink your students will follow.
Click the follow icon again to leave your students on that web page and free to browse.
Tips: Click the Favorites option from the top menu bar and it will display all your usual bookmarks from Internet Explorer. Select the required bookmark to save time browsing.
An alternative method is to simply copy a saved Internet Explorer bookmark and paste it to the Playlist window – students can then double click on the link to open that Web page.
How to restrict the Web pages that students can browse to – Digital language lab Sanako Study 1200
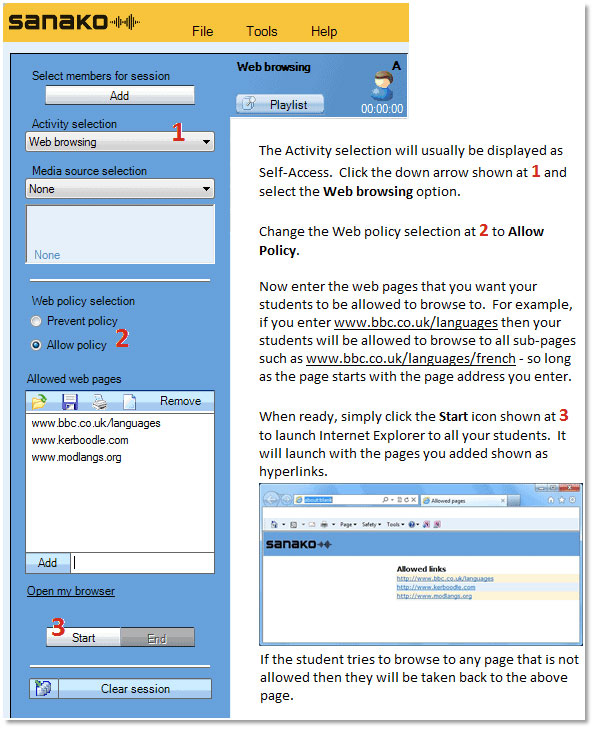
Tips: Make sure that you add ALL the sites that link from the main web page you want to allow students to browse. For example, if you allow students to go to http://www.bbc.co.uk then if they click on a news link they will be taken to http://news.bbc.co.uk – hence you would also have to add the http://news.bbc.co.uk page to your allowed list.
You can save the list as a .RUL (Rule) file to a location of your choice so you can use it on another time.
How to disable Internet access – Digital language lab Sanako Study 1200
1. Click the PC control icon
2. Select the Disable internet option from the drop-down menu.
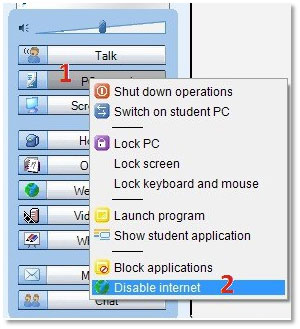
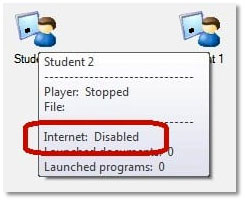
Your students will no longer be able to browse the Internet.
Hold your mouse over any student icon to verify that internet access has been disabled.
To give your students Internet access back simply repeat steps 1 and 2 above. If you close the Tutor application or log off, shut down, restart then Internet access is restored.
Digital Language Lab Content Exercise Activity
The Content exercise activity is used together with either ready-made or custom content provided by Sanako.
The activity allows you to launch content files directly to students. This will open an exercise window on the student players where they will be able to access the learning material, complete any exercises within and use the player to listen and record.
To launch a content file to students, select the Content Exercise activity and click Select and then browse for the file.